

Here's a side-by-side of the finished product, followed by an explanation of how I went about the tutorial:

The first was her red carpet look, characterized by feminine neutrals and bold liner and lashes:

The second was her performance look, which featured more dramatically contoured cheeks and eyes:

And the third was her unforgettable award acceptance look, which added a dramatic red lip to the mix:

So my tutorial will re-create all three lovely versions of the chanteuse; focusing on the red carpet look and how to subsequently amp things up to emulate her performance and award-winning makeup. I really hope you enjoy it!
The internet is buzzing with breakdowns of the actual products that were used on Adele for the Oscars (courtesy of the genius makeup artist, Michael Ashton); I did my best to create the look with goodies from my own kit. I used a mix of drugstore and high-end products for the look, maybe some items that you have in your own collection!
So without further ado, here's the tutorial:
1) Prime the skin: For an ultra-flawless skin look (and to make foundation last longer) opt for a foundation primer suited to your skin's needs. My normally oily skin was slightly more parched than usual (stupid winter cold!), so I used a sample of Smashbox Photofinish Hydrating Foundation Primer, applied evenly with fingers.
2) Apply a moderate coverage foundation- Adele's look featured semi-matte skin with a nearly opaque finish. So if you have a heavy duty foundation in your collection, now's the time to use it! I chose Revlon ColourStay Whipped Creme Makeup in Buff, applied with fingers (though it works well with a buffing brush too!).
3) Conceal any imperfections that were not covered by the foundation for a flawless look. If you've used a moderate-full coverage foundation, you will only need to use concealer under the eyes and on any remaining red marks or spots. I used Cle de Peau Concealer in Ivory (applied with fingers on larger areas and with the Kevin Aucoin concealer brush on small blemishes).
Here's what it looked like at this point:
4) Powder the skin, to keep things matte. You can skip this step if you have very dry skin; otherwise, add a bit of powder to set the foundation and eliminate any remaining shine. I used Revlon ColourStay Pressed Powder in Light, applied with a large powder brush.
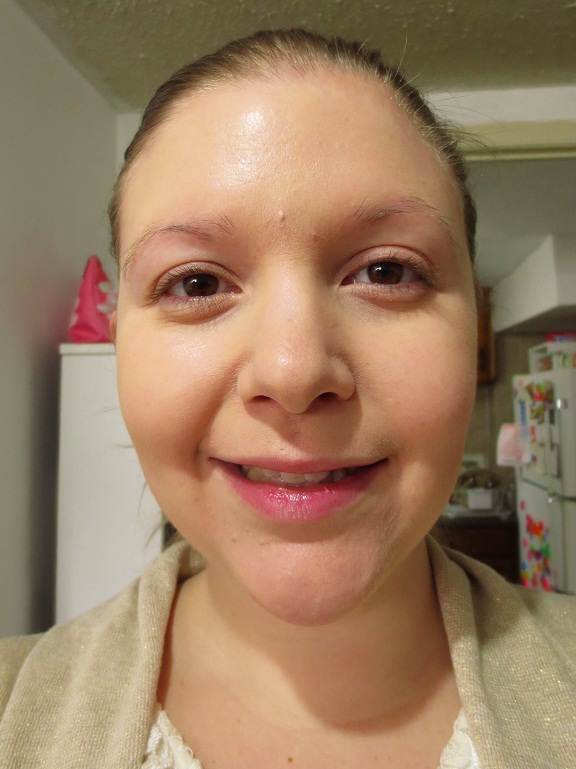
5) Define brows. Adele's look featured brows that were defined, but not overly bold. Add just enough brow colour to keep things looking strong and polished, without going over-the-top. I used Anastasia's Brow Powder Duo in Ash blonde with and angled brush.
Here's a shot with the face and brow powder added:

6) Contour the cheeks with blush. Adele's look featured cheek colour that was used to brighten the face and also add a touch of contouring the the cheekbones. The blush she wore seemed to be a mixture of mauve, pink, and peach. A blush in any one of these colour families would work! I chose NYX Mauve Blush and used a blush brush, applying along the cheekbones, up to the temples.


7) Prime the eyes. To ensure that the eye makeup sticks around and looks as bold as possible, apply an eye shadow primer before any colour. I used Urban Decay Primer Potion in Original, applying with the wand, then blending with my fingers.
8) Highlight the lid, using a champagne shadow. Adele's blue eyes really popped against the shimmery champagne shade that was applied all over her lid. I copied this lovely touch, using a shade from the NYX For Your Eyes Only Mysterious Brown Eyes palette with a large eye shadow brush, focusing on the inner half of the lid and blending up and out.
Here's what it looked like:


9) Define the crease. The red carpet look featured a subtle contouring of the eye socket using a soft, warm brown shade. I opted for MAC Eye Shadow in Bronze applied with a fluffy blending brush using a 'windshield wiper' motion to gently define the crease of the eye.
This was the result:


10) Apply liquid liner to top and bottom lash lines. Adele's signature makeup feature is most definitely bold, retro-inspired winged eyeliner. For this look, dark black liquid liner is a must!! I used my favourite liquid liner, Revlon ColourStay Liquid Eyeliner Pen in Black. For underneath the eye, I softened the line slightly with an angled liner brush.


11) Mascara! To emulate Adele's uber-full lashes, opt for a lengthening or volumizing mascara and don't be afraid to use a heavy hand! I applied a few coats of Clinique High Impact Mascara in Black to top and bottom lashes. You can definitely also use false lashes if you are so inclined!


12) Add a mauvey-nude lip. Adele's lips on the red carpet were painted a fresh mauvey-pink, slightly nude shade. I tried to re-create this, using a combination of Lush Emotional Brilliance Lipstick in Perspective and MAC Lipstick in Warm Me Up.
This is what it looked like!

And ta-da! Adele's red carpet look:


I was happy with the result, despite my pitiful attempt at her half-up hairdo ;)


The next step is to add some extra drama to achieve her stunning performance look. To do this, simply:
13) Deepen the cheek contour using bronzer. During Adele's performance of "Skyfall" (totally infectious song, btw), here cheeks appeared dramatically chiseled, providing a striking structure to her face. To achieve this, I applied Hard Candy So Baked Bronzer in Hula Hula using and angled face contouring brush in the hollows of the cheeks, blending up to the temples. You can use the excess bronzer on the brush along the jawline for extra definition!

14) Deepen crease colour with a deep brown eye shadow. Adele's eye makeup definitely looked more dramatic on stage than it did on the red carpet. To smoke things out a bit and up the drama, use a smaller eye brush to add a deeper brown shadow precisely to the crease of the eye. I used MAC Eye Shadow in Mulch, a rich neutral brown.


15) Add a deeper, bronzy lip colour. Adele's lips featured a warmer and deeper tone during her performance. To achieve this makeup change, I used Chanel Aqualumiere Lipstick in Zanzibar over top of Bare Escentuals Lip Liner in Nude.

And there you have it! Just a few additional steps to get to Adele's "Skyfall" look!


I was going to pose with a fake microphone to add to the "performance" theme of this look, but luckily I decided against it ;)

And now, one final step to create Adele's Oscar acceptance look:
16) Create a vibrant, glossy red lip! A stunning red lip was the hallmark of Adele's makeup when she accepted her award. To emulate this, I used Lush Emotional Brilliance Lipstick in Decisive topped with MAC Russian Red Lipglass. Before applying the dramatic colour, I lined my lips with a natural lip liner, my favourite ever- MAC Subculture Lip Pencil.

And here it is, the final look!


I also took a couple of shots of me kissing a fake Oscar (a golden bottle of Caudalie Divine Oil, to be exact) to copy the adorable shot above, but it wasn't so charming when I did it. So I left those ones out ;)


I really felt quite glamorous wearing this makeup! Oscar-worthy, almost ;)
I hope you found this tutorial to be helpful! How do you think I did? Is this a look you would have fun creating?
Thanks for reading, y'all :)
you both have amazing hair :) + this makeup look really suits you ;)
ReplyDeletehttp://noiretblancbeautyblog.blogspot.co.uk/
Ah, thanks so much! I've been using the Lush Sea Spray on my hair lately and have been loving it :)
DeleteYou look absolutely stunning - the addition of the red lip is amazing :) x
ReplyDeleteAww, thanks so much, Mali! I was really happy with how the red lips turned out. MAC Russian Red Lipglass is fantastic :)
DeleteWow, the red lip looks amazing! And really suits you :)
ReplyDeletehttp://whatwouldaudreywear.blogspot.co.uk/
Thanks so much, Jodie! I recently got the MAC Russian Red Lipglass and I've been loving it. Worked well for this look! :)
DeleteThis is truly Adéle-ish dear! I always love her make-ups though she usually exagerates on fake eyelashes.
ReplyDeleteYou look lovely as per usual and lip colour is to die for!
xx, Sandra @ Blasfemmes
Thanks so much, Sandra! Always appreciate your kind words :) I thought about doing false lashes for the look (since Adele definitely wears them), but I opted for my natural lashes for a slightly softer look :)
DeleteThanks for the tutorial! You look so gorgeous, I actually didn't notice she had three different looks (whoops). And wow at your lashes!! I really need to get my hands on the Clinique mascara.
ReplyDeletehttp://dreamdustx.blogspot.com
Aww, thanks so much, Louise! Clinique mascaras are definitely my favourite, especially Lash Doubling and High Impact. They work great and aren't too expensive!
DeleteI love a nude lip and bold eye on you so much! My fave of her three looks (on you) is the first. I definitely need to look into the Lush Perspective lip color. So pretty!
ReplyDelete(You rock the other two looks too).
And I appreciate the step-by-step with the eye color. That's the most difficult makeup skill for me to master.
Thanks so much, Sheri! I don't rock a nude lip often, so it's nice to hear that you think it works! And you should check out Lush Perspective for sure- think you would love it! :)
DeleteLove it! Its really good that you did all three looks and I can really see the resemblance to Adele's look!
ReplyDeleteThanks, Marvelle! I thought it would be neat to do all three, since everyone might have a favourite look and because each kind of built upon the last. Glad you liked it! xoxo
DeleteThat's crazy, you look like sisters!! It's unbelievable what make-up can do... I really like the second one, very sultry.;) Have a fun weekend, babe!
ReplyDeleteAww, thanks so much, Peet! Maybe if I pose as Adele's sister more often I'll get some perks down the line... ;) Hope your weekend's been great too! :)
DeleteAmazing look re-creation! x
ReplyDeleteThanks! xo
DeleteThe Red lipstick really suits you,
ReplyDeleteyou look like a Hollywood movie star :)
http://classicquirk.blogspot.co.uk/
Aww, thanks so much, Kiera! I did feel pretty glamorous when the look was finished ;)
DeleteYour liquid lining skills are amazing! x Becky
ReplyDeleteCosmetic Debris
Thanks, Becky! It's taken lots of practice for sure, but the Revlon Liquid Eyeliner Pen really is easy to use. It has a felt-tipped applicator, which makes things much easier!
DeleteYou did a great job! I really like the Mac Warm Me Up lipstick! So pretty and natural. I'm trying to find a lipstick like that.
ReplyDeleteI would love it if you would check out my blog!
simplecharmbeauty.blogspot.com
Aww, thanks so much! A lot of nude lipsticks don't work on me, but Warm Me Up really is a lovely shade. Will check out your blog for sure :)
DeleteYou look amazing! loving the eye makeup xx
ReplyDeletewww.lam-style.blogspot.com
Thanks so much, Maricruz! Glad you liked it :)
Deletewow, thanks for the tutorial (:
ReplyDeleteits super fun and clear!
xo,
shannon marie
http://fashion-impossible.blogspot.com
Thanks! So glad you found it helpful. I had fun creating it too :)
DeleteThese are all great looks on you! I especially like the 'skyfall' look in the middle. I love makeup tutorials, great post
ReplyDeleteHolly xo
http://hollslucy.blogspot.co.uk/
Thanks so much, Holly! The Skyfall look was fun to do- it's been nice getting better at contouring :) Glad you enjoyed the post!
DeleteYou look FANTASTIC. Hands down, this is one of your best tutorials. You're an artist.
ReplyDeleteAww, thanks so much! So glad you enjoyed it- had a lot of fun creating the look. Your kind words and support always mean so much :) xo
DeleteWhaw, great look!! The eyes are really pretty - that liner is just perfect. And love that healthy flush & contouring on your cheeks. I'll have to replicate this one :)
ReplyDeleteIsabelle, nailsandcupcakes.com
Thanks, Isabelle! So glad you enjoyed it and found it helpful and that you're wanting to try it yourself :)
DeleteLove this tutorial, especially that red lips. It's so chic and beautiful.
ReplyDeleteThanks so much! Glad you enjoyed it :) I was really happy with how the red lip turned out. Will have to wear MAC Russian Red Lipglass more often!
DeleteGreat tutorial!! Love the red lips!
ReplyDeleteWould you like follow each other?
Let me know.
XOXOXO
Thanks so much for the kind words and for stopping by! Will check out your blog for sure :)
DeleteWhat a great post! Love the makeup look :) x
ReplyDeletewww.tlnique.blogspot.com
Thanks so much, Levi! The kind words mean a lot! xo
DeleteWhat a neat tutorial! You did a great job of re-creating her looks.
ReplyDeletewww.ameliorerlavie.blogspot.com
Thanks so much, Lisa! Glad you liked it :)
Delete